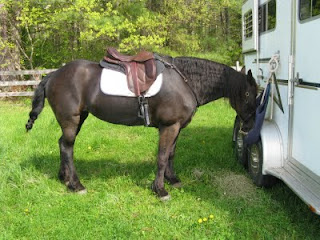
Over the years, I have owned dozens of saddles, dozens. None of which, really worked for Daatje. She was always tight and defensive in her back and when the demands increased (foxhunting, long hours in the saddle) her back, and her attitude, showed signs of soreness.
I've been riding her dressage in a treeless saddle for a few years now. I have an Ansur Carlton that she goes fabulously in, never an issue with her back under this saddle. My problems have been with my jumping saddles. They are the ones that she spends the most time under and they are the ones that don't fit her unusual carriage horse shape!
I had looked into buying an Ansur Konklusion, but man are they pricey! So I shopped around and settled on the Sensation G4 Jump made by Nickers Saddlery in Canada. I chose the Sensation for it's nice shape, comfortable construction, hard use leathers (better weight distribution) and competitive price. (I paid $1,300 for it brand spanky new)
For those of you less familiar with the pros and cons of treeless saddles, the absence of a tree is both a blessing and a curse. It's a blessing for horses built like Daatje, where off the rack tree shapes and widths pinch and bridge and just don't wrap around her big, robust shoulders very well. It's a curse because now you've taken away the weight distributing properties of the tree.
Enter the special companion pad. Skito makes them, Grandeur makes them......Haf makes them....all for a very pretty penny and not quite configured how I wanted it.....
....so I made one.....well, another one.... :)
I had made one for my Ansur, and silly me thought it would work for the Sensation too. Yeah, not quite. :) Size and shape differ greatly between the Carlton and the G4 Jump!
I gathered the materials to make inter pad #2 and went to work. I used my Mom's antique treddle sewing machine (I love that thing!), nylon thread, 1680 Cordura Nylon, Lexan inserts (contoured and shaped), open cell polyurethane slow recovery memory foam and a bit of velcro to create my own weight distributing treeless interpad with spinal clearance.
Pieces cut out

Keeper straps sewn on. I use thick shoe laces to tie the pad to the D-rings on the saddle, front and back. This keeps the pad from shifting out from under the saddle.

Pockets for the Lexan inserts

Closer view of the Lexan pocket

Two halves pinned and ready to stitch

Stitched, clipped corners, turned right side out and put foam in to test fit.


Finished front edge

Next I stitched around the edges

Two halves connected

Finally, 8 hours later, the pad is complete.

Folded in half

Nicely fits under the Sensation G4 Jump.

Top view

Back view.

Now, I can finally begin to break in the Sensation. I've only ridden in it once, because I didn't have the proper pad to put under it. Of course, tomorrow is Monday and I'll be at work.....and the forecast for May isn't looking so good....here's hoping for good weather so I can ride!!!


